How to Stop a Leaky Faucet From Wasting Your Water
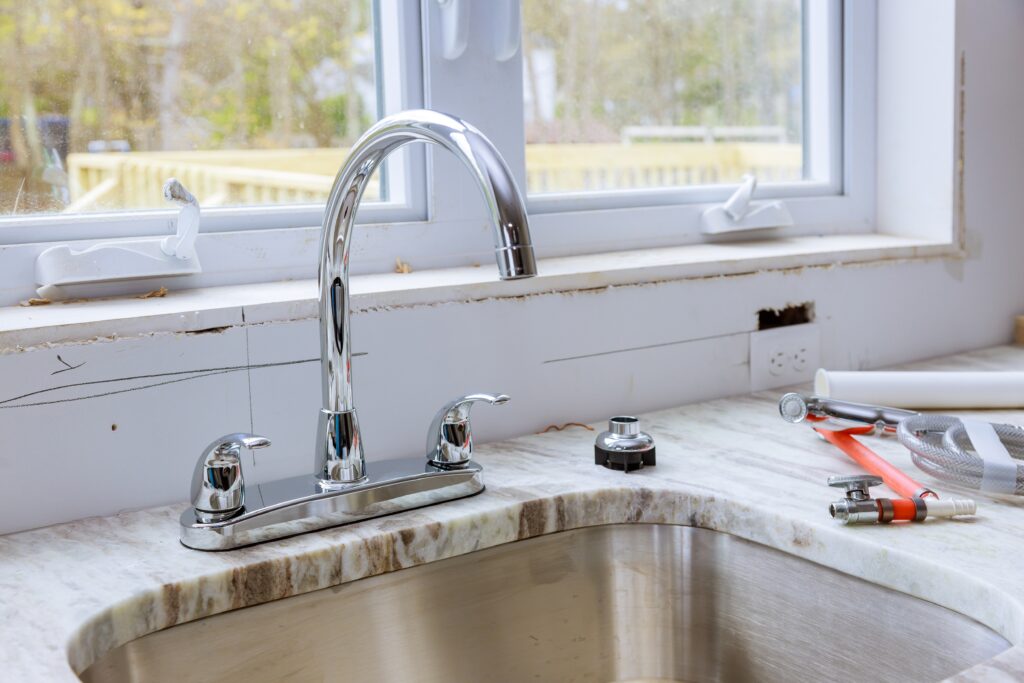
A leaky faucet is one of the most common plumbing problems homeowners face, and it quietly drains both your water supply and your wallet at the same time. That steady drip you hear at night might seem harmless, but a single faucet leaking at one drip per second wastes over 3,000 gallons of water per year. In late spring and early summer, when household water usage climbs from lawn care, gardening, and increased indoor activity, fixing leaks becomes even more important for managing your monthly bill. The good news is that most leaky faucets can be repaired with a clear understanding of what causes the leak and how to address the root issue. BlackRock Plumbing Company has spent years helping Princeton, McKinney, and surrounding North Texas homeowners stop water waste at the source. This guide walks you through the causes of faucet leaks, the steps to fix them, and the long-term strategies that keep your plumbing efficient. Knowing how to stop a leaky faucet from wasting your water gives you control over your home, your bills, and your peace of mind.
What Causes a Leaky Faucet to Waste Your Water
Faucet leaks rarely happen out of nowhere; they almost always result from worn internal components, mineral buildup, or pressure issues inside your plumbing system. The constant movement of water through tight valve seats and rubber seals slowly wears those parts down over months and years of use. When even one tiny seal fails, water finds the easiest path of escape, which is usually out of the spout or around the base of the handle. Hard water in the Princeton and McKinney area accelerates this wear because mineral deposits coat the inside of faucet parts and create friction. Identifying the type of leak you have is the first step in stopping the water waste and protecting your fixtures.
The Worn Washer Issue Behind a Leaky Faucet
A worn washer is the most common cause of a leaky faucet in older compression-style fixtures, and it explains most slow drips from the spout. Every time you turn the handle, the rubber washer presses against a metal valve seat to stop the flow of water. Over time, that repeated pressure deforms the rubber, cracks its edges, and reduces its ability to form a tight seal. Once the washer fails, water seeps past it even when the handle is in the off position, producing that familiar dripping sound. Replacing a washer is generally a straightforward repair, but it requires shutting off the water supply, disassembling the handle, and matching the new washer exactly to the size and shape of the old one. Using the wrong washer or overtightening the assembly can make the leak worse, so careful work matters. If your home has multiple compression faucets of the same age, expect more leaks to follow as the washers reach the end of their lifespan.
Mineral deposits inside the faucet also play a major role in how quickly a washer wears out, especially in homes with hard water. As calcium and magnesium build up on the valve seat, the surface becomes rough and abrasive against the soft rubber washer. Every turn of the handle then grinds the washer down faster than it would in a home with treated water. You might replace a washer only to see the leak return within a few months because the valve seat itself is damaged and needs resurfacing or replacement. A professional plumber can use a seat-dressing tool to smooth the surface or swap out the seat entirely for a longer-lasting fix. Homeowners dealing with repeated washer failures should also consider a whole-home water filtration system to reduce mineral content. Treating the water that flows into your faucets protects every fixture in the house, not just the one currently leaking.
You also need to consider the quality of the replacement parts you choose when fixing a worn washer leak. Generic washers from a discount bin may not match the original specifications, and that mismatch leads to early failure and continued water waste. Brand-specific repair kits usually include the correct washers, O-rings, and screws designed for your exact faucet model. Taking the old parts to a hardware store or, better yet, calling a licensed plumber ensures you get the right fit the first time. A small investment in quality parts can extend the life of your faucet by several years and stop the slow waste of water that drives up your bill. If you are unsure about the brand or model of your fixture, take a clear photo before disassembly to help with identification. Need help diagnosing a stubborn drip? Click here for our faucet repair service.

The Damaged O-Ring Problem Causing a Leaky Faucet
Damaged O-rings are another frequent cause of a leaky faucet, and they typically produce leaks around the base of the handle rather than the spout. An O-ring is a small rubber loop that sits around the stem of the faucet and creates a watertight seal where the handle meets the body. With years of use, the O-ring loses its elasticity, develops cracks, or simply slips out of position from constant handle rotation. Once that seal fails, water escapes upward and pools around the base, often dripping down into the cabinet below the sink. This kind of slow leak is especially damaging because the water can rot wood, warp cabinet floors, and feed mold growth long before anyone notices. Catching an O-ring failure early saves you from far more expensive repairs down the road.
Replacing an O-ring requires removing the handle, sliding off the old ring, and installing a new one of the exact same diameter and thickness. The challenge is that O-rings come in dozens of sizes, and even a slight mismatch causes the leak to return within days. Lubricating the new O-ring with plumber’s grease before installation helps it seat properly and extends its useful life. Avoid using petroleum-based products like Vaseline because they break down rubber over time and shorten the lifespan of the seal. A professional repair includes inspecting the stem for grooves or pitting that might damage the new O-ring as soon as it is installed. If the stem itself is worn, the entire cartridge or stem assembly should be replaced to stop the leak permanently. Cutting corners on this repair almost always leads to repeat visits and continued water waste.
Cartridge-style faucets use multiple O-rings inside a single removable unit, and any one of them can fail and cause leaking. These cartridges are designed for longer service life than traditional washers, but they still wear out, especially in homes with hard water or high water pressure. When a cartridge starts to leak, the most reliable fix is to replace the entire cartridge rather than trying to swap out individual rings. Manufacturers sell replacement cartridges matched to specific faucet models, and using the correct one ensures a tight seal and smooth handle operation. If your faucet uses a ceramic disc cartridge, the discs themselves can crack from temperature changes or sediment, requiring a full cartridge replacement. A licensed plumber can identify the cartridge type, source the correct replacement, and install it in a fraction of the time it would take a homeowner working without the right tools.
The Corroded Valve Seat Cause of a Leaky Faucet
A corroded valve seat is one of the more stubborn causes of a leaky faucet, and it often produces a leak that returns no matter how many washers you replace. The valve seat is the metal surface where the washer presses down to stop the flow of water through the spout. Over years of contact with water, especially water containing high mineral content, that metal surface develops corrosion, pits, and rough patches. Once the valve seat is no longer smooth, a washer cannot form a complete seal against it, and water continues to drip even with brand-new parts installed. Homeowners often spend money on repeat washer replacements without realizing the seat is the real problem. Recognizing a corroded valve seat early saves both time and water.
Repairing a corroded valve seat requires either resurfacing the seat with a specialized tool called a seat wrench and dressing kit or removing and replacing the seat entirely. Resurfacing works well when the corrosion is light and the seat threads are still in good condition. However, if the seat is deeply pitted or the surrounding faucet body shows signs of corrosion, replacement is the better option. Removing a seized valve seat takes patience because the threads are often locked in place by years of mineral buildup. Forcing the seat with the wrong tool can damage the faucet body and turn a simple repair into a full faucet replacement. A licensed plumber has the right tools to handle either approach safely and ensure the new seat creates a perfect seal.
Preventing future valve seat corrosion comes down to managing the water quality in your home. Installing a water softener or a whole-home filtration system reduces the minerals that cause corrosion in the first place. Regular cleaning of faucets with vinegar or a mild descaler can also slow the buildup of deposits inside the fixture. If your faucet is more than fifteen years old and shows signs of repeated leaks at the spout, full replacement may be more cost-effective than continued repairs. Modern faucets use ceramic disc technology that resists corrosion far better than traditional compression designs. Investing in a new fixture not only stops the leak but also reduces water waste from a more efficient flow design.
How to Stop a Leaky Faucet Step by Step
Stopping a leaky faucet from wasting your water requires a methodical approach that starts with identifying the leak source and ends with verifying a complete repair. Rushing through the process or skipping steps almost always leads to a returning leak and frustration. The right tools, the right replacement parts, and a clear understanding of your specific faucet type make the job manageable. Before you begin, gather an adjustable wrench, a screwdriver set, replacement washers or cartridges, plumber’s grease, and a clean rag. Take photos at each step of disassembly so you can put the faucet back together correctly. Following a careful sequence protects your plumbing and stops the water waste for good.
Shutting Off the Water to Stop a Leaky Faucet
Shutting off the water supply is the essential first step in stopping a leaky faucet, and skipping it leads to flooding and damage. Under most sinks you will find two shutoff valves, one for hot water and one for cold, each connected to the faucet by a flexible supply line. Turn both valves clockwise until they stop, which closes off the water flow to the faucet only and leaves the rest of the house unaffected. After closing the valves, turn the faucet on to release any remaining pressure and confirm that water is no longer flowing. If you do not have local shutoff valves, you will need to close the main water supply to the entire house before starting the repair. Older valves sometimes stick or fail to fully close, which is a sign they need to be replaced as part of the repair.
Once the water is off, plug the sink drain with a stopper or a clean rag to prevent small parts from falling down the pipe during disassembly. Faucet repairs involve tiny screws, springs, and O-rings that can disappear forever if they drop into an open drain. Lay out a soft towel on the counter to organize each part as you remove it, keeping them in the order they came off. This makes reassembly faster and reduces the chance of leaving out a critical component. Take a moment to inspect the area under the sink for signs of existing water damage, which would indicate the leak has been going on longer than you thought. Address any soft wood or mold separately to prevent further damage to your home.
Testing the shutoff before disassembly is a smart habit that confirms you have full control over the water supply. Open the faucet handle fully and watch for any drip or trickle, which would indicate one of the shutoff valves is not closing completely. If the leak continues from the faucet itself even with the valves closed, you may need to shut off the main supply instead. Failing shutoff valves are common in homes with older plumbing, especially those with multi-turn valves that wear out from infrequent use. Replacing old shutoffs with modern quarter-turn ball valves makes future repairs much easier. A plumber can install new shutoffs during the same visit as your faucet repair, saving you a separate service call. If you are dealing with multiple plumbing issues at once, click here for our faucet repair service.
Disassembling the Fixture to Stop a Leaky Faucet
Disassembling the faucet correctly is the next step in stopping a leaky faucet, and it requires patience and attention to detail. Start by removing the decorative cap on top of the handle, which usually pops off with a flathead screwdriver or pulls off by hand. Under the cap you will find the screw that holds the handle in place; remove it carefully and set it aside in a small dish. Lift the handle straight up to expose the stem, cartridge, or ball assembly underneath, depending on the type of faucet you have. Take a photo at each stage so you can reverse the process during reassembly without confusion. Avoid using excessive force at any point because faucet bodies are often made of soft brass or zinc alloys that crack or strip easily.
Once the handle is off, you can access the internal components that need inspection and likely replacement. Compression faucets have a stem with a washer at the bottom, held in place by a small brass screw. Cartridge faucets have a removable cartridge held in place by a retaining clip or nut. Ball-style faucets use a rotating ball mechanism with springs and seals beneath it. Ceramic disc faucets use a cartridge with two ceramic plates that slide against each other to control water flow. Each design has its own quirks, so identifying your faucet type before disassembly helps you know what to expect. Manufacturer instructions or online guides for your specific model provide useful reference during the process.
Cleaning each part as you remove it gives you a chance to inspect for damage and prepare for reassembly. Use white vinegar and a soft brush to remove mineral deposits from the stem, cartridge, or valve seat. Wipe the faucet body clean inside and out to remove buildup that could interfere with the new seals. Inspect every rubber component for cracks, flattening, or stretching, and replace any that show wear, even if you are not sure they caused the leak. Bringing the old parts to a plumbing supply store makes finding exact replacements much easier than guessing from memory. If you cannot find a match, a licensed plumber can often source manufacturer-specific parts through their professional channels. Replacing all worn components at once prevents future leaks and extends the life of the entire fixture.
Reassembling and Testing to Stop a Leaky Faucet
Reassembling the faucet correctly is what locks in the repair and stops the water waste for good. Apply a thin coat of plumber’s grease to all new O-rings and rubber seals before installing them, which helps them seat properly and prevents tearing. Slide each part back into position in the reverse order of disassembly, referring to your photos if you took them. Tighten screws and nuts firmly but not excessively, because overtightening can crack the faucet body or compress new washers too far and cause early failure. The goal is a snug fit that creates a seal without crushing the parts. Reattach the handle, secure the screw, and replace the decorative cap to finish the assembly.
Turning the water back on requires the same care as shutting it off, and rushing this step often reveals problems that could have been avoided. Open the shutoff valves slowly to let the system pressurize gradually, which reduces the risk of water hammer or sudden leaks from a poorly seated part. Watch the faucet closely for any drips from the spout or around the handle base as the pressure builds. Run both the hot and cold water for at least a minute to flush out any debris that may have entered the lines during the repair. Check under the sink with a flashlight to confirm there are no leaks from the supply lines or the shutoff valves themselves. A dry connection after several minutes of use indicates the repair was successful.
Final testing should include several rounds of turning the faucet on and off to make sure the new components seal properly under repeated use. Listen for any unusual sounds like whistling or knocking, which can indicate trapped air or a part that is not fully seated. Feel around the base of the handle for moisture after each test, since some leaks only appear during active use. If everything checks out, dry the faucet thoroughly and monitor it over the next 24 hours for any returning drip. A small leak that returns within a day usually means a part was not seated correctly or the wrong replacement size was used. Persistent leaks after a careful repair point to a deeper issue like a damaged faucet body or supply line, which requires professional attention. For complex repairs or older fixtures beyond DIY fixes, our team is ready to help.
Why You Need Professional Help for a Leaky Faucet
While many faucet leaks can be addressed with basic tools and patience, some situations call for the experience and equipment of a licensed plumber. Repeat leaks after multiple repair attempts, hidden water damage under the sink, or fixtures connected to corroded supply lines are all signs that professional service is the smarter choice. A trained plumber not only stops the current leak but also identifies related issues that could cause bigger problems down the line. In Princeton, McKinney, and the surrounding North Texas communities, hard water and aging plumbing make faucet repairs more complicated than they appear. BlackRock Plumbing Company provides the local knowledge and skilled workmanship needed to stop water waste for good.
Expert Diagnosis to Stop a Leaky Faucet Permanently
A licensed plumber brings diagnostic skills that go beyond what most homeowners can do with online research alone. When a leak keeps returning, the cause is often deeper than a single worn part, and identifying that root cause takes trained eyes and the right tools. A professional can spot hairline cracks in the faucet body, pitting in the valve seat, or pressure imbalances in the supply lines that all contribute to ongoing leaks. They also understand how water quality, fixture age, and household usage patterns affect long-term performance. This comprehensive view leads to repairs that actually solve the problem rather than just treating the symptom.
Diagnostic tools used by professional plumbers also help locate hidden leaks that homeowners might miss. Moisture meters, pressure gauges, and inspection cameras reveal problems behind walls, under cabinets, and inside fixtures. These tools confirm whether the leak you see at the faucet is the only issue or part of a larger plumbing concern. Catching a related leak in a supply line or shutoff valve during the same visit saves money and prevents future emergencies. A thorough diagnosis is the foundation of a lasting repair.
Experience matters when diagnosing complex faucet issues because not every leak follows the textbook patterns. A plumber who has worked on hundreds of faucets recognizes subtle clues that point to specific problems. They can often identify the brand and model of a faucet at a glance and know which parts commonly fail on that design. This knowledge speeds up the repair and ensures the right parts are used the first time. Trusting a professional with diagnosis turns a frustrating cycle of repeat leaks into a one-time fix.
Quality Parts and Tools to Stop a Leaky Faucet
Professional plumbers have access to high-quality replacement parts that are often unavailable at retail hardware stores. Manufacturer-specific cartridges, brass valve seats, and premium O-rings all outperform generic alternatives in lifespan and reliability. Using the right parts is one of the biggest differences between a repair that lasts a few months and one that lasts a decade. Plumbers also carry a wide inventory on their service trucks, so most repairs can be completed in a single visit without delays. Homeowners who try to source parts on their own often face return trips to the store and longer downtime without a working faucet.
Specialized tools also play a major role in successful faucet repairs that homeowners typically do not own. Cartridge pullers, seat wrenches, basin wrenches, and torque-controlled drivers all make the job faster, cleaner, and more precise. These tools prevent damage to delicate faucet components during disassembly and reassembly. Trying to substitute pliers or makeshift tools often results in scratched finishes, stripped threads, or cracked fixtures. A plumber’s toolkit is built specifically for this kind of work and produces better results.
Warranty protection is another reason to choose professional service for a leaky faucet repair. Most licensed plumbers stand behind their work with service warranties that cover both parts and labor for a defined period. If the leak returns within that window, the plumber returns to fix it at no additional cost. Manufacturer warranties on new fixtures and parts are also more likely to remain valid when installation is done by a licensed professional. This combination of warranty protection gives homeowners real peace of mind that their investment is protected.
Why Choose BlackRock Plumbing Company to Stop a Leaky Faucet
BlackRock Plumbing Company brings ten years of experience serving Princeton, McKinney, and the surrounding North Texas communities with honest, reliable plumbing service. Our licensed and insured team understands the specific challenges of local water conditions, aging plumbing, and the wide range of fixture brands found in area homes. We arrive on time, diagnose the problem clearly, and explain your options before any work begins. Every repair is backed by our commitment to integrity and quality workmanship that earns five-star service reviews from our customers. Stopping a leaky faucet is simple work for us, but we approach it with the same care as any major plumbing project.
Our 24/7 emergency plumbing service means you never have to wait through a weekend or holiday with a leak that is wasting water and damaging your home. We respond quickly throughout our service area, which includes a 25-mile radius around Princeton covering McKinney, Plano, Frisco, Allen, Wylie, and many other communities. Whether the leak is a minor drip or a major flow problem, our team has the tools and parts to fix it on the first visit in most cases. We treat your home with respect, clean up after every job, and leave the work area better than we found it.
Honest pricing is at the core of how we do business at BlackRock Plumbing Company, and we never recommend repairs or replacements that you do not actually need. Our upfront estimates give you a clear picture of the cost before any work starts, with no surprises added later. We believe in building long-term relationships with our customers through fair pricing and quality service rather than quick upsells. Ready to stop your leaky faucet from wasting water and money? Click here for our faucet repair service and let our team handle the job the right way.